Signing with a guest account
You can sign documents in FP Sign without an FP Sign user account.
Follow these steps:
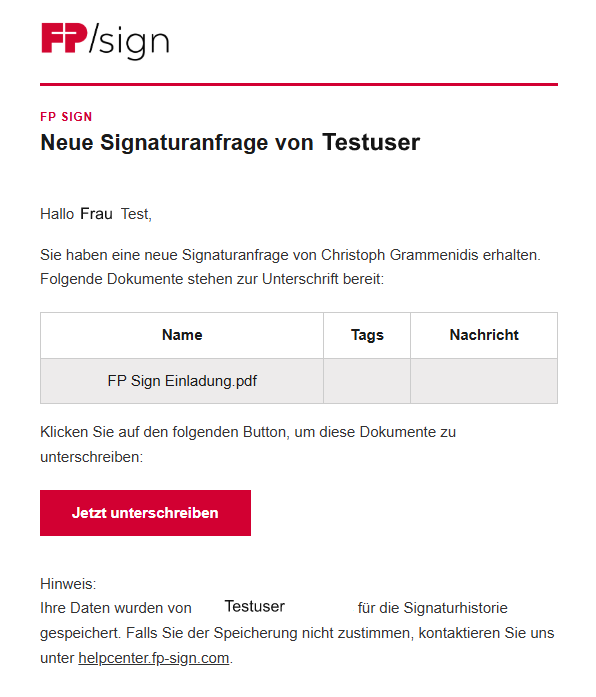
- Open the link in the email from FP Sign
- (If prompted, check your text messages and enter the one-time code)
- Review the document
- Select Sign
- Select or upload a signature image
- Confirm
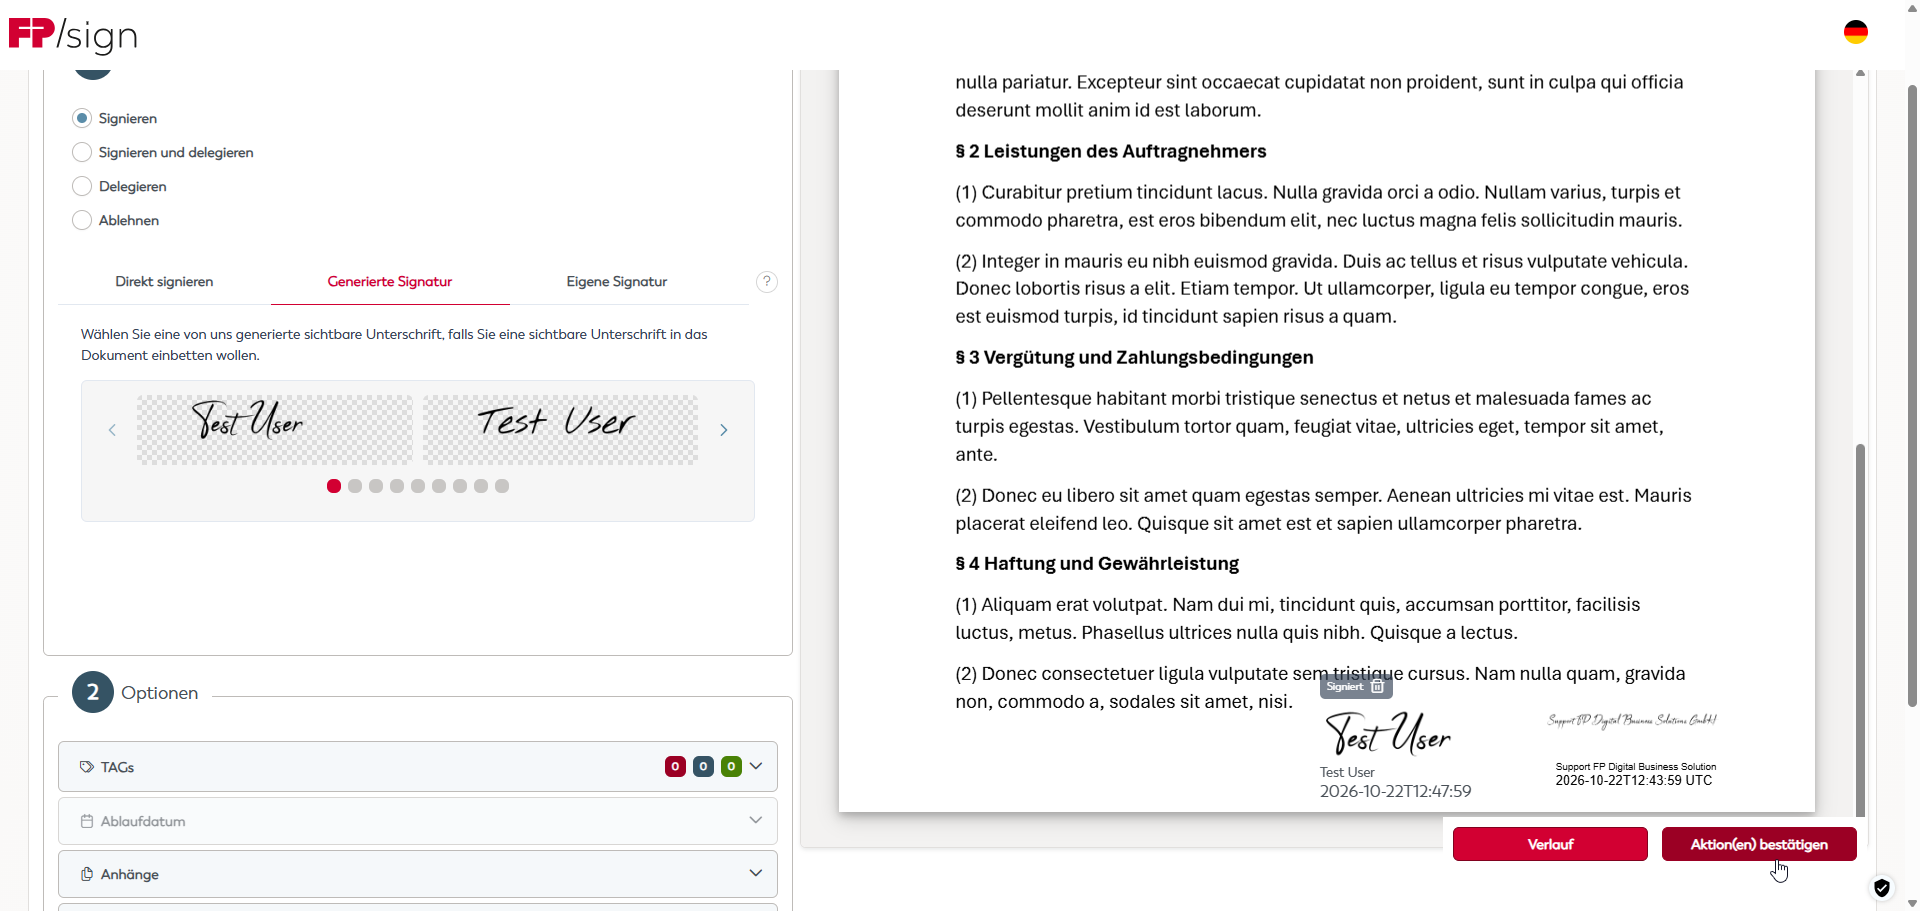
Note: If you receive several documents in a single document folder, they appear one after another. Repeat steps 2-6 for each subsequent document.
When you have finished, a thank-you page appears. If another person is involved in the workflow, they will now receive a notification.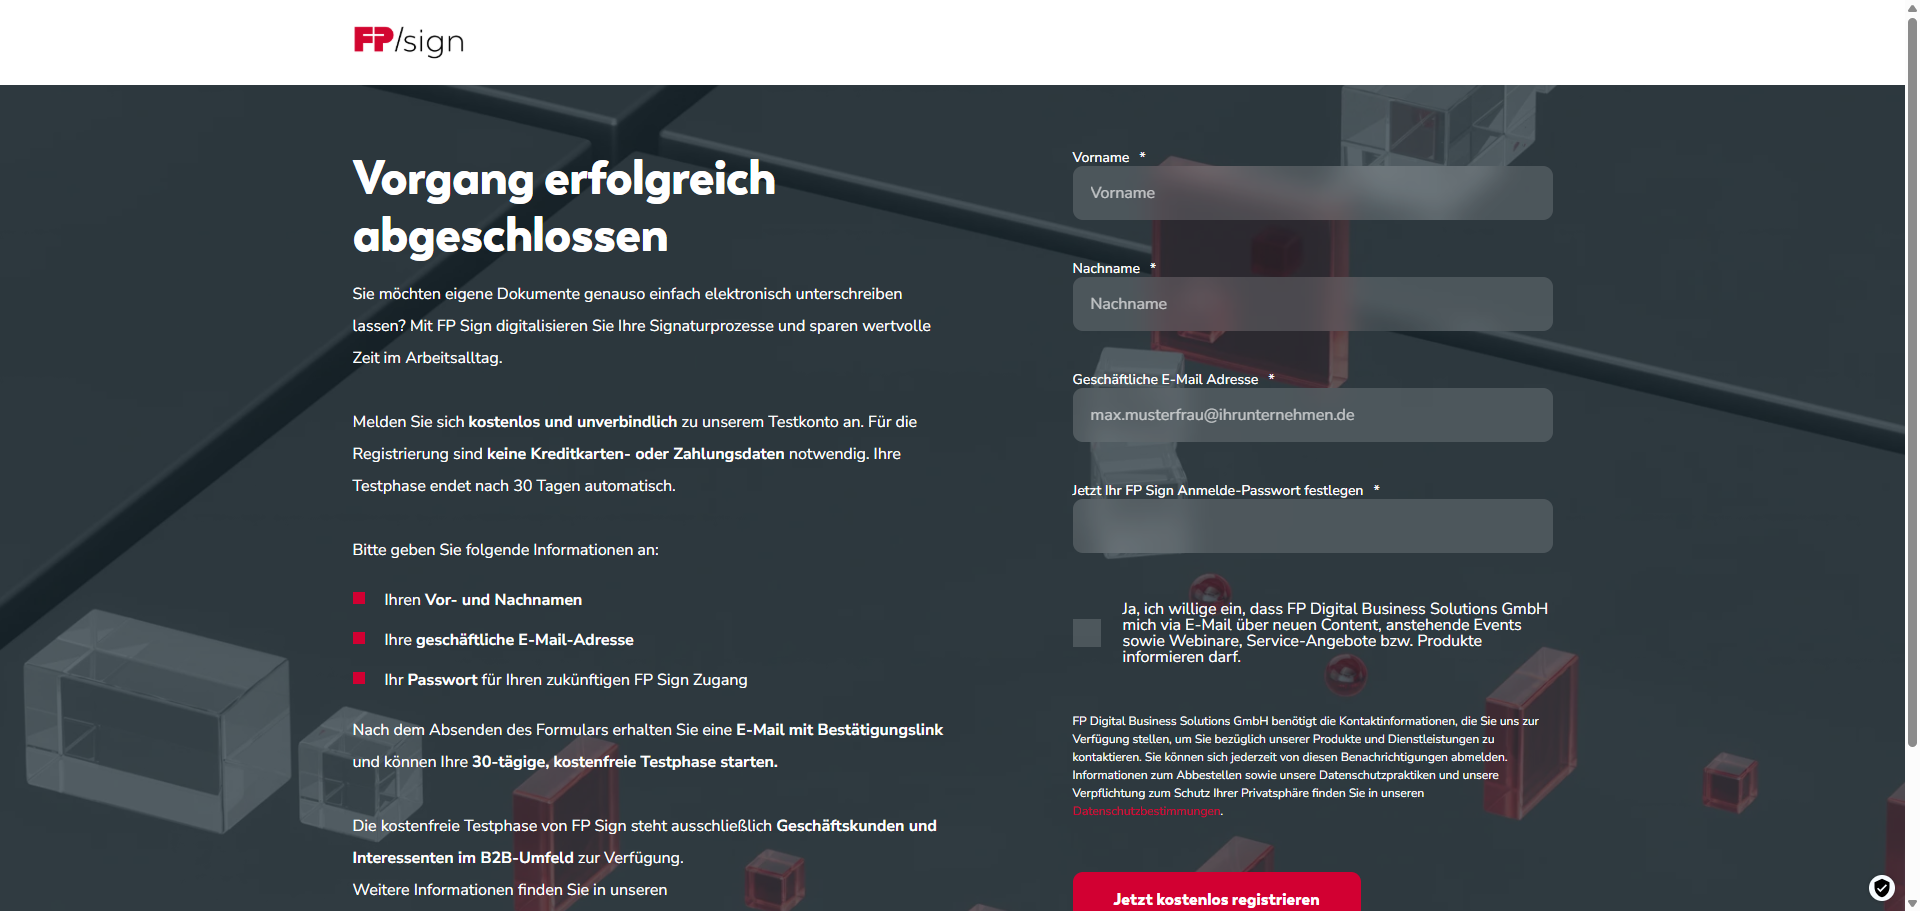
Once all participants have completed the action assigned to them by the person who created the request, you will receive the signed document and the workflow report by email.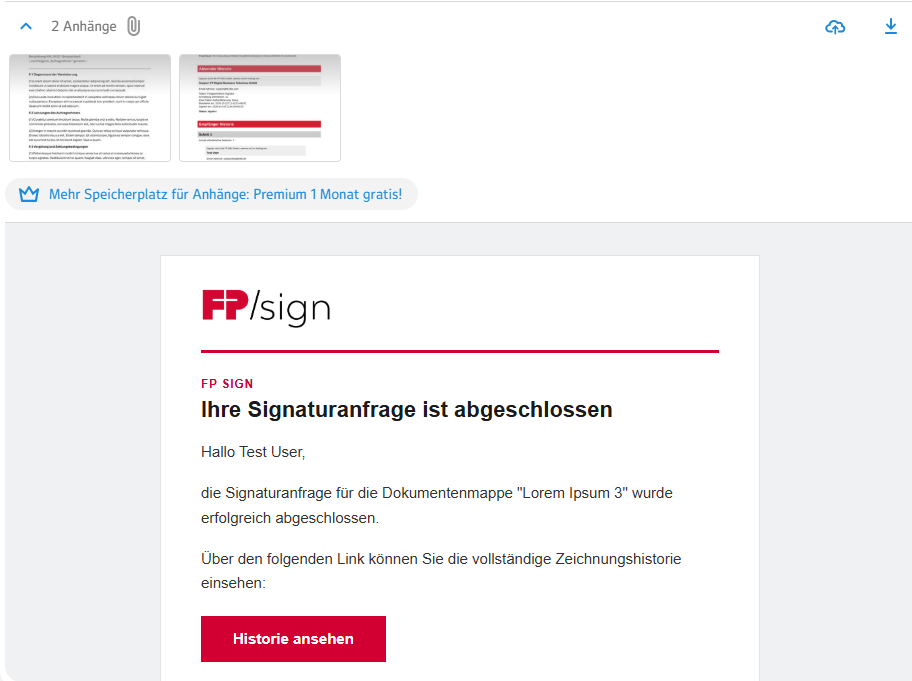
Signing with an FP Sign user account
You can sign documents in FP Sign using an FP Sign user account.
First, complete your FP Sign registration. If you have not yet registered, follow these steps:
- You will have received an email inviting you to register an FP Sign account
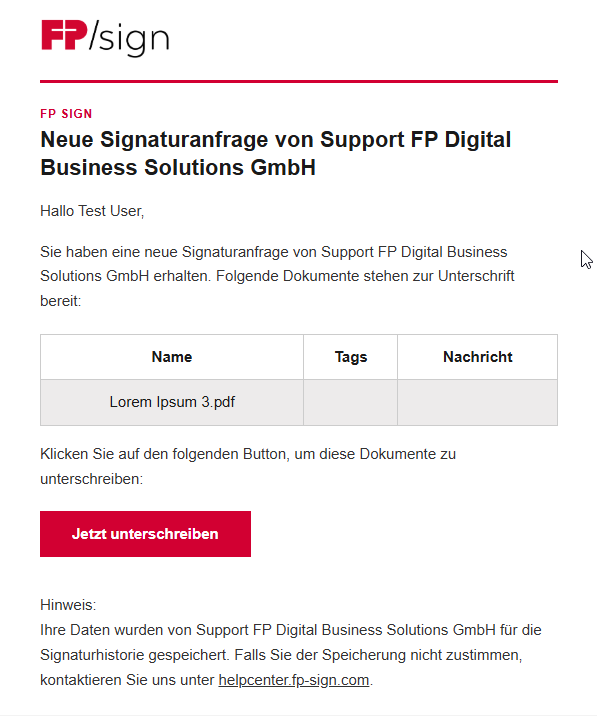
- If you have lost this email, use the "Forgot password" option
- Click the link in the email
- Enter your credentials and sign in to FP Sign
- If you have lost your credentials, use the "Forgot password" option
- Sign in to FP Sign

- Accept the FP Sign terms and conditions and privacy policy
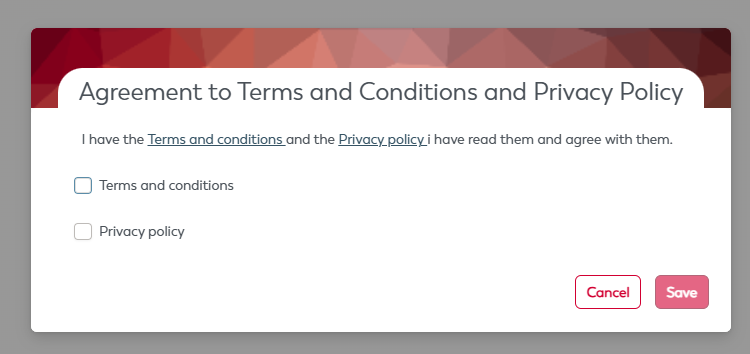
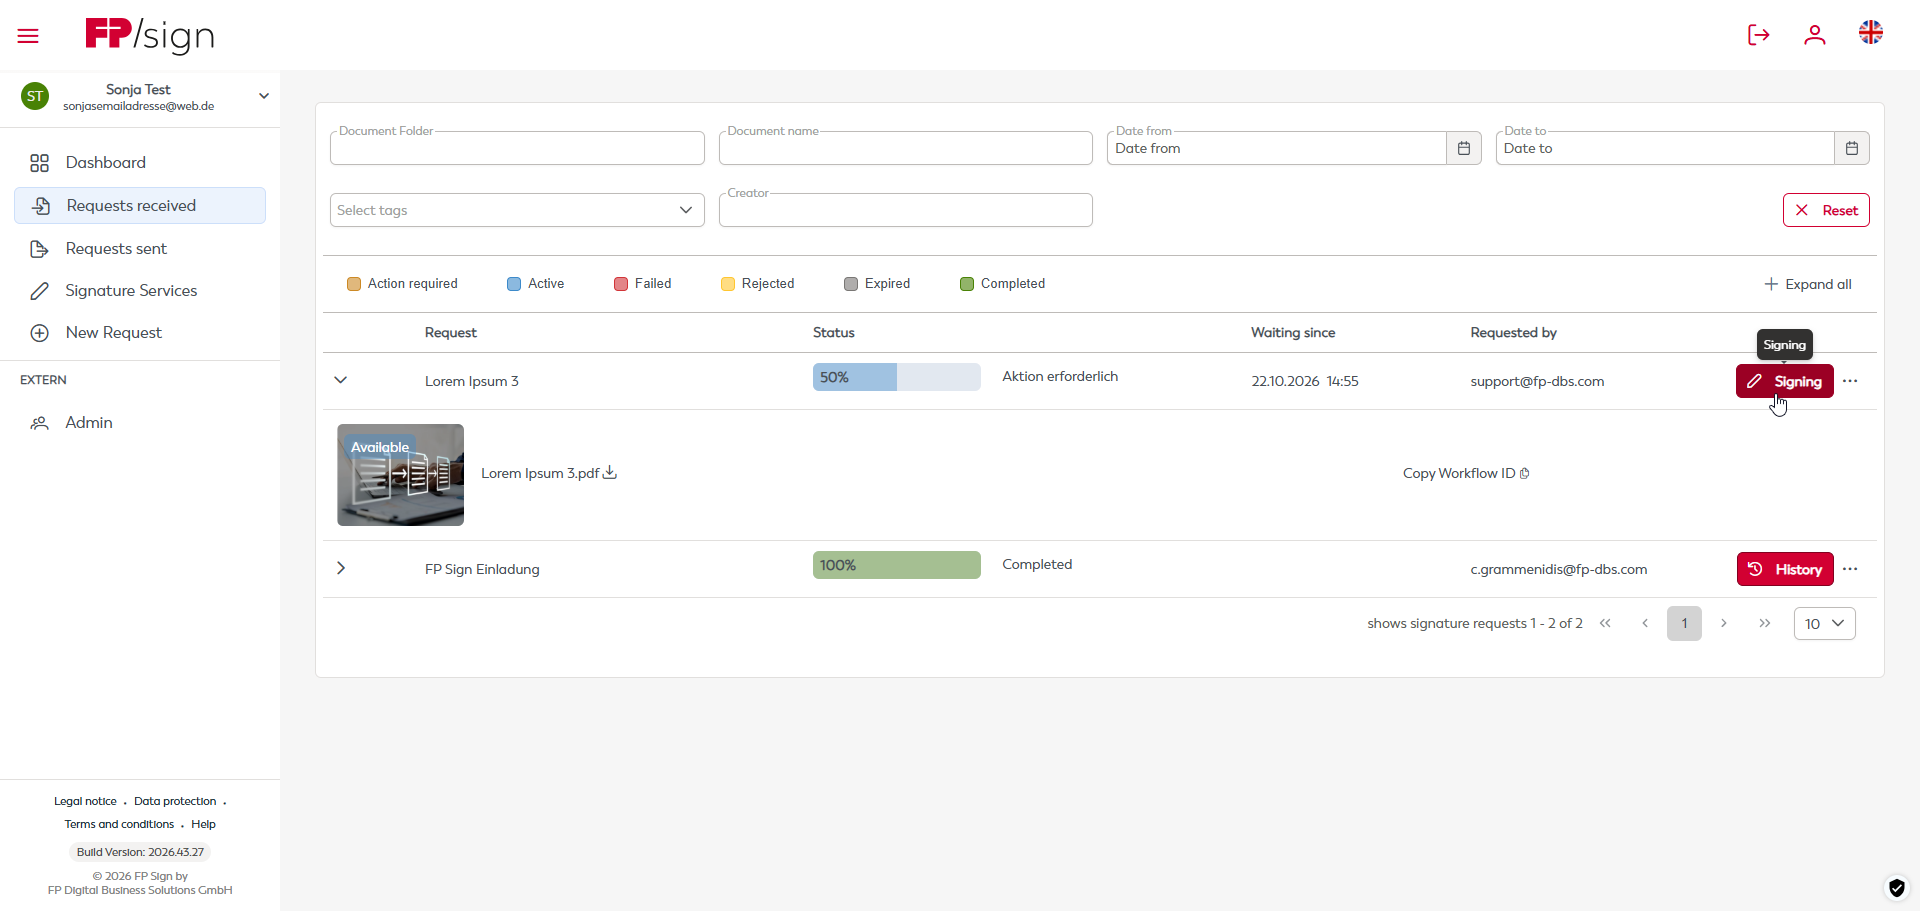
- You are now registered with FP Sign and signed in to your account. Check the requests you have received.
Note: If you do not see a request, it may not have reached you yet because the person before you in the workflow has not completed their step.
- Open "Received requests"
- Click "Sign"
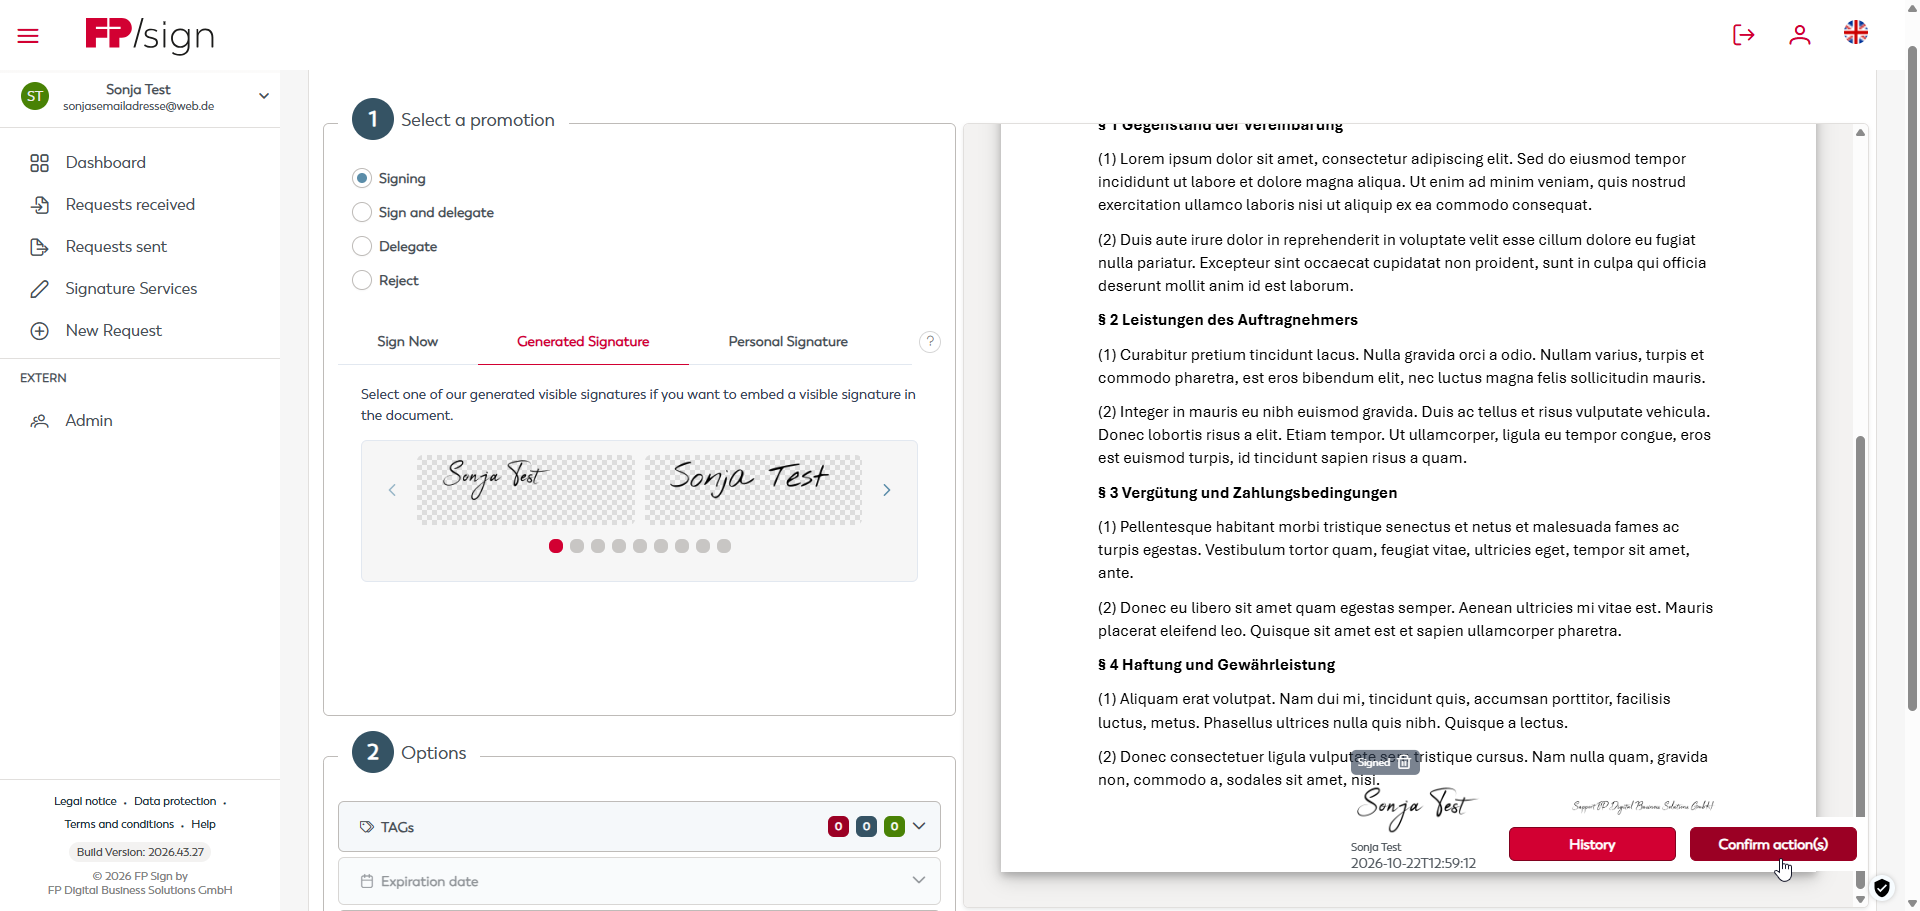
- Select "Sign"
- Select or upload a signature image
- Confirm
- The FP Sign dashboard then appears. If another person is involved in the workflow, they will now receive a notification.
Once all participants have completed the action assigned to them by the person who created the request, you will receive the signed document and the workflow report by email. You can also download the signed document under "Received requests" > "Signed requests".
Delegating a signature request
You can delegate signature requests in FP Sign.
To use this option, the person who created the request must have enabled delegation in the request settings.
- Follow the same steps as for signing
- Select "Sign and delegate" or just "Delegate"
- With "Sign and delegate", you can sign the document digitally and then send it to a recipient of your choice for signature
- With "Delegate", you can forward the signature request to a recipient of your choice
Sign and delegate:
- Select or upload a signature image
- Place your signature
- Add a recipient
- Click "Confirm recipient"
- Click Confirm
Delegate:
- Add a recipient
- Click "Confirm recipient"
- Click Confirm
The FP Sign dashboard then appears. The person you delegated the request to will receive it by email.
Once all participants have completed the action assigned to them by the person who created the request, you will receive the signed files and a workflow report by email.
Was this article helpful?
That’s Great!
Thank you for your feedback
Sorry! We couldn't be helpful
Thank you for your feedback
Feedback sent
We appreciate your effort and will try to fix the article